Creating a VPN Connection
A VPN connection defines the connectivity settings and credentials required to enable a VPN connection to your on-premise VPN server. After creating a connection, you can then attach it to an app, and the app can connect to on-premises TCP services with the VPN.
To create a new VPN connection:
- Log in to TIBCO Cloud™ Integration.
- Click the Environment & Tools tab.
- Click VPN Connections.
The VPN Connections page opens.
- If you have not created any connections and the page is empty, click the Cisco or Juniper icon to create a new connection. If you have already created one or more connections, click + Add in the upper left of the page to add a new VPN connection.
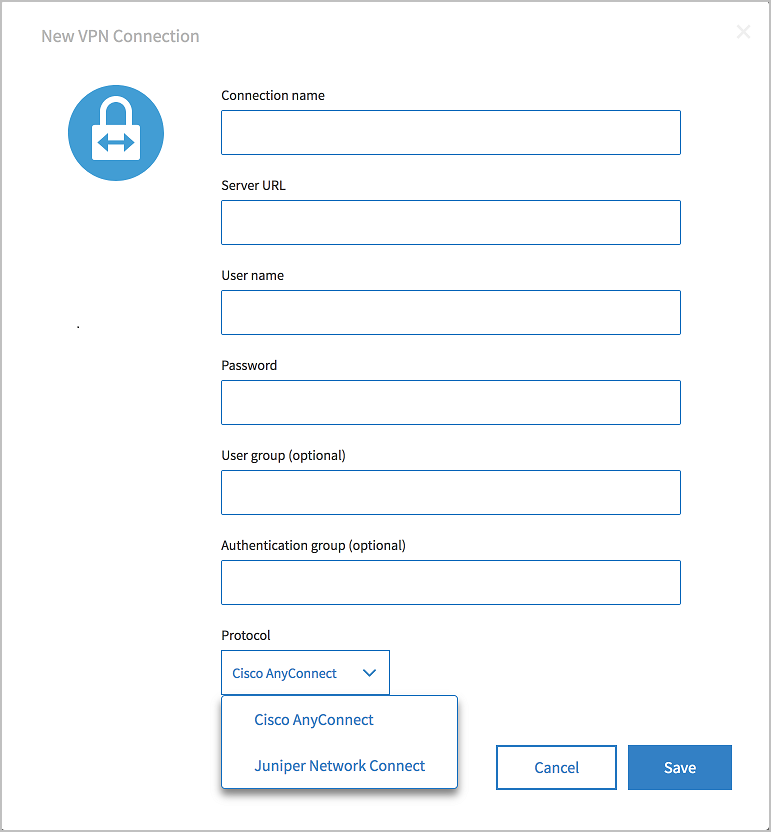
The New VPN connection dialog opens.

- Fill in the following properties for the connection:
Properties Description Connection name The name of the VPN connection. Server URL The URL for your on-premise VPN server. User name The username to log in to your VPN server. Password The password to log in to your VPN server. User group (optional) An optional user group for your VPN login. Authentication group (optional) An optional authentication group for your VPN. Protocol The VPN protocol, either Cisco AnyConnect or Juniper Network Connect. - Click Save to save the connection, or Cancel to revert changes.
Role Requirements
- A VPN created by an Admin is only usable by the Admin.
- A VPN created by a user is only usable by the Admin.
- Read-only users cannot make VPN changes on any app.