Exporting And Importing Flows
After you create one or more flows, use the import/export feature to save your current flows as a single JSON file and then reuse the flows with other apps.
Exporting Flows
Export one or more flows to save the flows in a JSON file and import them into other TIBCO Cloud™ Integration - Connect apps.
- Select Apps from the menu.
- On the Apps page, select an app name to open it.
- On the Flows tab, select one or more flows to export by marking the check box for the flows or selecting the check box above the list to select all flows.
- Above the list of flows, click Export.
- TIBCO Cloud™ Integration - Connect creates a single JSON file with the same name as the app. Any characters that are not alphanumeric are stripped out of the file name. Depending on the browser the file is stored in your default downloads location or you are asked to save it.
Importing Flows Into An Existing App
Flows can be imported into an existing app or TIBCO Cloud™ Integration can create an app during the flow import process using the Create App dialog. All of the notes associated with importing flows are true in both cases. For steps on importing flows using the Create App dialog see Importing an App.
When you receive a file with flows to import, save the file to a convenient location, such as the SampleMaps sub-directory under your Connect on-premise agent directory. When a flow is imported, the first revision has the associated comment Imported in the Revisions dialog for that flow. See Flow Revisions for more information.
- Select Apps from the menu.
- On the Apps list, select an app name to open it.
- On the Flows tab, select the New Flow button and choose Import.

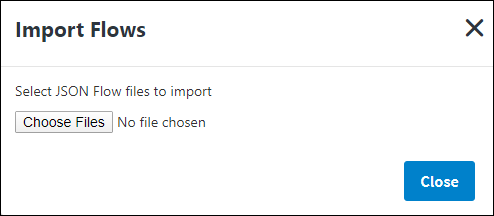
- Use the Choose File button to browse to the location of the flow file you want to import.
- Select the file and select Open. The flows are imported immediately.
- TIBCO Cloud™ Integration - Connect imports the selected file and adds all of the flows in the file to this app, as follows:
- If the app already contains flows, the new flows are appended to the existing flow list.
- Every imported flow is renamed with the prefix Imported - . For example if the original name of the flow is Update Contacts, the new name after import is Imported - Update Contacts.
- If the app contains flows with the same names as those in the import file, the existing flows are overwritten with the imported flows. However, since flow names are modified on import, the only way a flow name would match is if the flow name in the app had a prefix of Imported, but the flow in the import file did not, as follows:
|
App Flow Name |
Import File Flow Name |
Flow Name After Import |
Import Action |
|---|---|---|---|
|
Update Contacts |
Update Contacts |
Imported - Update Contacts |
Appends flow to list |
|
Imported - Update Contacts |
Update Contacts |
Imported - Update Contacts |
Overwrites existing flow |
|
Update Contacts |
Imported - Update Contacts |
Imported - Imported - Update Contacts |
Appends flow to list |
|
Imported - Update Contacts |
Imported - Update Contacts |
Imported - Imported - Update Contacts |
Appends flow to list |
Importing an exported flow revision always appends the flow to the list of flows in the app. See Exporting A Flow Revision.
Complete Imported Flows
- On the App Details Flows tab locate an Incomplete flow.
- Select the flow to open it. Note: TIBCO Cloud™ Integration - Connect attempts to match the Connections in the imported flow with the correct Connections configured in the Organization. If Connection Names or IDs in the imported flow do not match Connections configured for the Organization, you must reassign those Connections to complete the flow. See Reassigning Connections.
- If a matching Connection cannot be found, a warning message displays in the Connections panel on the flow workspace. Select Reassign on the Gear menu to choose a replacement Connection. See Reassigning Connections.Note: If you validate an imported flow before reassigning Connections, you will see multiple duplicate errors in the Errors and Warnings tab, instead of a single error.
- When the correct Connections are set in the flow, allow the entities to populate and then make any necessary changes to ensure that there are no errors or warnings. See Block And Flow Errors And Warnings.
- When you are done, click OK to close and save the flow.
- After you have updated all your flows, exit the app. Changes to apps are saved immediately.