Adding Or Editing A Lookup Table
A Lookup Table creates a connection between a set of values in your source data and the associated values in your target. Lookup Tables can also be imported from a CSV file or exported to a CSV. This can be useful if your Lookup data already exists in another TIBCO Cloud™ Integration - Connect Organization or some other program. See Importing Or Exporting Lookup Tables.
Note: The Sort icon for the Value 1 column, used for manually sorting a Lookup table, is only enabled when a new item is added. If you sort the contents of a Lookup table manually, you are returned to the first row on the first page of the table. Data is sorted in binary order, for example, 1, 11, 12, 2, 20, 3.
Before you begin, make sure you know what values you plan to map in both your source and target data sources.
- From the menu, select Environment & Tools.
- Under Environment Settings, select Lookup Tables.
- From the Lookup Tables page, select a Lookup Table to edit or select New Lookup Table to create a new Lookup table. TIBCO Cloud™ Integration - Connect creates an empty Lookup Table and opens the Lookup Table dialog.
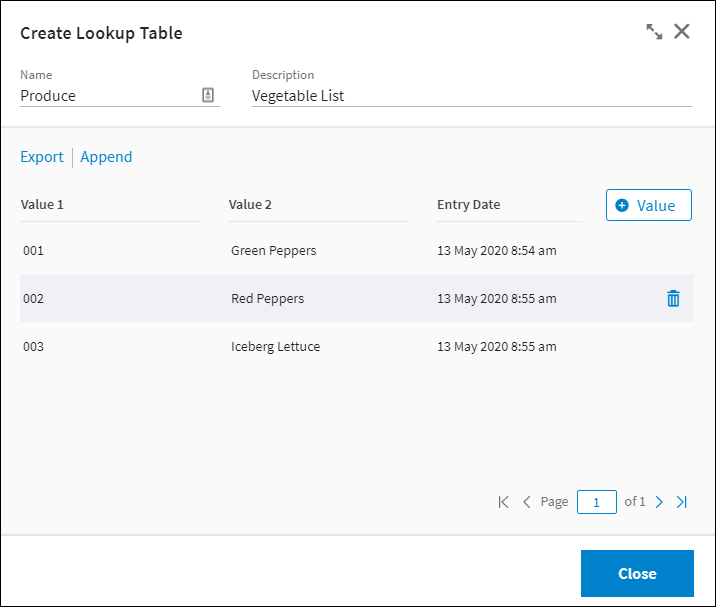
- Modify the name for this Lookup Table, and optionally, enter a description. Only alphanumeric characters, underscore, and dash are supported in these two fields.
Note: Consider using the Description field to call out the entities and fields you are using for this Lookup table.
- Select the Value button to add a row to the table. Under the Value 1 and Value 2 columns, blank table cells display in the first row at the top of the list. A date time is added in the Entry Date column. Note: When you add a new item to a Lookup table, the focus remains on the first row of the table allowing you to continue adding rows. The new data is not sorted until you move to another page using the arrows at the bottom, you close and reopen the dialog, or you click the Sort icon next to the Value 1 column. Manual sorting is only enabled when a new item is added and takes you to the top of the first page of the list.
- Select the Value 1 field and enter an existing value for the field you want to map in the source entity.
- Select the Value 2 field and enter the associated field value for the target entity field.
- Select the Value button again to create additional rows in the Lookup Table.
- When you have finished the table, select Close. Changes to the Lookup Table are saved as they are entered.

You can now use your Lookup Table with any of the LOOKUPTABLEVALUE functions.
Note: To allow the Lookup Table to map fields that contain either an empty string or a NULL, you can use an empty string. A NULL value in the Lookup Table is translated to the string "NULL".
Note: While Lookup Tables are most often used to map a set of values between your source and target entities, you can use them to provide mappings between any two sets of values in your data.