Generate An OAS Document For Request/Reply Flows
In TIBCO Cloud™ Integration - Connect you can design a Request/Reply flow that parses an inbound message from another application and sends back a response to that application. In some applications, you can quickly configure the format of a message to send to TIBCO Cloud™ Integration - Connect by pasting in a URL requesting an OAS document, instead of entering the format manually. The TIBCO Cloud™ Integration - Connect API supports generating OAS documents for a single Request/Reply flow, all Request/Reply flows in an app, or all Request/Reply flows in an Organization.
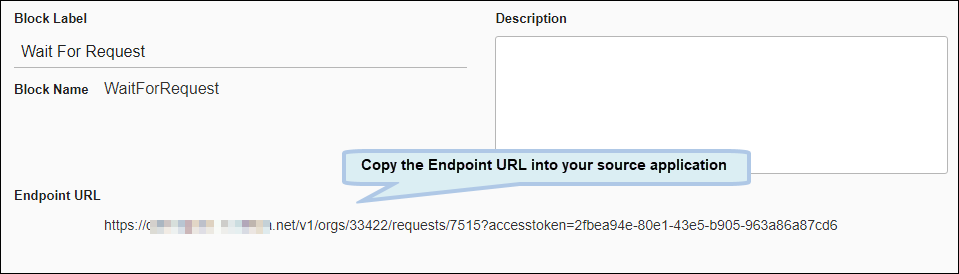
In TIBCO Cloud™ Integration - Connect, the first Block in a Request/Reply flow, Wait For Request, generates an endpoint URL to which messages can be sent and from which OAS documents can be generated. To locate the endpoint URL, navigate to your Request/Reply flow, open the Wait For Request Block Properties dialog, and copy the endpoint from the General tab.
In the Wait For Request Block Properties dialog on the Request tab, you define how the inbound message is parsed by listing the field name and data type of each field expected in the message.

See Defining An On Event Request/Reply Flow and Request/Reply Flow Example for details on creating a Request/Reply flow.
OAS Documentation Considerations
- Only OAS Version 2.0 is supported. See the OAS 2.0 Specification for more information.
- Only enabled and complete Request/Reply flows are supported.
- Request/Reply flows in disabled apps are ignored.
- If you are documenting an existing Request/Reply flow, you may need to open it and save it again to enable this feature.
- If/Else Blocks are ignored. The content is provided, however it is not generated as a conditional. This is a limitation of OAS 2.0.
- Multiple Blocks at the same hierarchical level with the same entity name are merged.
- Set of data types is limited. See Data Types in the OAS Specification for more information.
- All objects are returned as arrays.
Generating The Documentation
The process for generating an OAS document varies depending on whether you want it to include a single Request/Reply flow, all Request/Reply flows in an app, or all Request/Reply flows in an Organization. The URL used for each of these scenarios is different and must be updated manually. Refer to one of the following sections for step-by-step instructions:
- Single Request/Reply Flow
- All Request/Reply Flows In An App
- All Request/Reply Flows In An Organization
- View Or Modify Contents Of An OAS Document
Single Request/Reply Flow
- In TIBCO Cloud™ Integration - Connect, navigate to your Request/Repy flow, open the Wait for Request Block, and copy the endpoint URL of the Request/Reply flow shown at the bottom of the General tab.
Example: https://endpoint.scribesoft.com/v1/orgs/7505/requests/1978?accesstoken=62204c80-6a52-4bfc-99b3-1f28025146d5
- Paste the URL into a text editor.
- Modify the URL and insert /api-docs as shown below to request the OAS document.
Example: https://endpoint.scribesoft.com/v1/orgs/7505/requests/1978/api-docs?accesstoken=62204c80-6a52-4bfc-99b3-1f28025146d5
Note: You can append &oasversion=2 to the URL to specify OAS Version 2.0, however that is not required since only OAS Version 2.0 is supported. - Paste the updated URL into the correct message configuration area for the application you are configuring to send messages to TIBCO Cloud™ Integration - Connect. The application requests the OAS document from the TIBCO Cloud™ Integration - Connect API and imports it. Depending on the application you are configuring, there may be additional steps. Refer to the Help or User Guides for the application for configuration information.
All Request/Reply Flows In An App
- In TIBCO Cloud™ Integration - Connect, navigate to one of your Request/Repy flows, open the Wait for Request Block, and copy the endpoint URL of the Request/Reply flow shown at the bottom of the General tab.
Example: https://endpoint.scribesoft.com/v1/orgs/7505/requests/1978?accesstoken=62204c80-6a52-4bfc-99b3-1f28025146d5
- Paste the URL into a text editor.
- In TIBCO Cloud™ Integration - Connect, close the Wait for Request block, but leave the flow open. Go to the browser address bar, locate and copy the ID of the app from the URL. It is the second number from the left.
Example: https://app.scribesoft.com/#!/advancedmapping/33422/35422f62-0942-4710-9125-ef01a20c033a/67eaf384-a7c4-401c-bd0b-30ff7c6fbf35/812324/IntegrationServicesAdvancedRequestResponseMap/false?tci=true
- Open the text editor with the endpoint URL and append the copied text to the endpoint URL, being sure to include &solutionId=.
Example: https://endpoint.scribesoft.com/v1/orgs/7505/requests/1978?accesstoken=62204c80-6a52-4bfc-99b3-1f28025146d5&solutionId=35422f62-0942-4710-9125-ef01a20c033a
- Modify the URL as follows:
- Remove the flow ID immediately following the requests/ section of the URL. This causes all Request/Reply flows in the app to be selected. In this example the flow ID is 1978.
Example Before Edit:
https://endpoint.scribesoft.com/v1/orgs/7505/requests/1978?accesstoken=62204c80-6a52-4bfc-99b3-1f28025146d5&solutionId=35422f62-0942-4710-9125-ef01a20c033a
Example After Edit:
https://endpoint.scribesoft.com/v1/orgs/7505/requests/?accesstoken=62204c80-6a52-4bfc-99b3-1f28025146d5&solutionId=35422f62-0942-4710-9125-ef01a20c033a
- Insert api-docs into the URL as shown below to request the OAS document.
Example: https://endpoint.scribesoft.com/v1/orgs/7505/requests/api-docs?accesstoken=62204c80-6a52-4bfc-99b3-1f28025146d5&solutionId=35422f62-0942-4710-9125-ef01a20c033a
Note: You can append &oasversion=2 to the URL to specify OAS Version 2.0, however that is not required since only OAS Version 2.0 is supported.
- Remove the flow ID immediately following the requests/ section of the URL. This causes all Request/Reply flows in the app to be selected. In this example the flow ID is 1978.
- Paste the updated URL into the correct message configuration area for the application you are configuring to send messages to TIBCO Cloud™ Integration - Connect. The application requests the OAS document from the TIBCO Cloud™ Integration - Connect API and imports it. Depending on the application you are configuring, there may be additional steps. Refer to the Help or User Guides for the application for configuration information.
All Request/Reply Flows In An Organization
- In TIBCO Cloud™ Integration - Connect, navigate to one of your Request/Repy flows, open the Wait for Request Block, and copy the endpoint URL of the Request/Reply flow shown at the bottom of the General tab.
Example: https://endpoint.scribesoft.com/v1/orgs/7505/requests/1978?accesstoken=62204c80-6a52-4bfc-99b3-1f28025146d5
- Paste the URL into a text editor.
- Modify the URL and remove the flow ID immediately following the requests/ section of the URL. This causes all Request/Reply flows in the Organization to be selected. In this example the flow ID is 1978.
Example Before Edit:
https://endpoint.scribesoft.com/v1/orgs/7505/requests/1978?accesstoken=62204c80-6a52-4bfc-99b3-1f28025146d5
Example After Edit:
https://endpoint.scribesoft.com/v1/orgs/7505/requests/?accesstoken=62204c80-6a52-4bfc-99b3-1f28025146d5
- Insert api-docs into the URL as shown below to request the OAS document.
Example: https://endpoint.scribesoft.com/v1/orgs/7505/requests/api-docs?accesstoken=62204c80-6a52-4bfc-99b3-1f28025146d5
Note: You can append &oasversion=2 to the URL to specify OAS Version 2.0, however that is not required since only OAS Version 2.0 is supported. - Paste the updated URL into the correct message configuration area for the application you are configuring to send messages to TIBCO Cloud™ Integration - Connect to import the definition. The application requests the OAS document from the TIBCO Cloud™ Integration - Connect API and imports it. Depending on the application you are configuring, there may be additional steps. Refer to the Help or User Guides for the application for configuration information.
View Or Modify Contents Of An OAS Document
If you need to see or modify the contents of a TIBCO Cloud™ Integration - Connect OAS Document, you can use the URLs created in the sections above in an application that allows you to send API requests.
- Open an application that allows you to send API requests, such as PostMan.
- Use one of the modified URLs in the API application to send a request to the TIBCO Cloud™ Integration - Connect API.
- You can paste the contents of the response into the application you are configuring instead of pasting the URL. This may be helpful if you need to modify the contents in any way.